Groundspeak Android App - Part 1 - Finding A Cache.
I thought I would do another update with the geocaching app and kind of do a step through to help people.
 This is the startup screen. It is only online for a few seconds.
 Screen #2 - The start screen
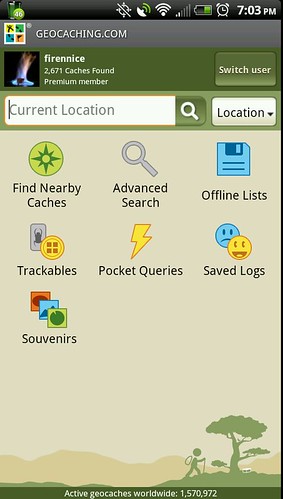
Start Screen
On the start screen there are a number of options. The first thing that you should do is click the button on the top. (See screen #2) The one here listed as "Switch User" I do not remember if there is another option if no one is ever put in. You will notice that when you are logged in you have your icon from geocaching.com, player name, find count and if you are a premium member.
On this page you see a number of options. (see screen #2 again) Of these we will only deal with the "Find Nearby caches" but first, select your menu button. Two options will pop up "Settings" and "Help" select the Settings button.
 Screen #3 - Settings
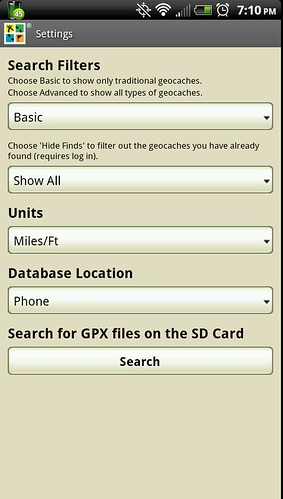
Settings
On the settings screen you can set it up to be able to modify your hunts for caches.
Basic/Advanced
The top one has two menu options. Basic and Advanced. When you do a search and have Basic selected, it will show only the traditional caches in the area. If you have Advanced everything will show up. This means it will include Letterbox, puzzle, multi-caches, events, etc. Everything that appears on a geocaching website will be on your screen
Show All/Hide Finds
The next option down is what will take off caches that you have already found. Sometimes you may not want to see the caches that you have already found. Removing them from your search list
Units
This lets you change things from Imperial (miles/feet) to metric (kilometers.meters)
Database Location
This will determine where the database is located on the phone or on the SD card.
 Screen #4 - The cache lis
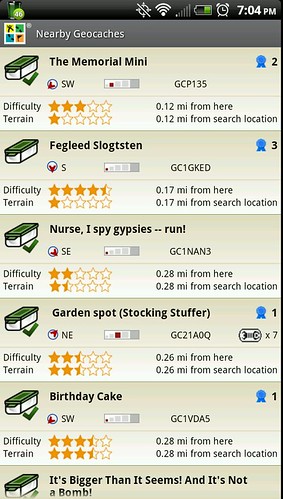
Now our actual search. If we go back to Screen #2 above is select the Find Nearby Caches. A list of caches will pop up.
This lets you know a number of things about the caches. The icon for the type of caches. The check-mark that is show points out that I have found the cache before. You also see the name, GC#, Direction, Distance Favorite Points, if there are trackables, distance, and difficulty/terrain.
You can select a cache here.
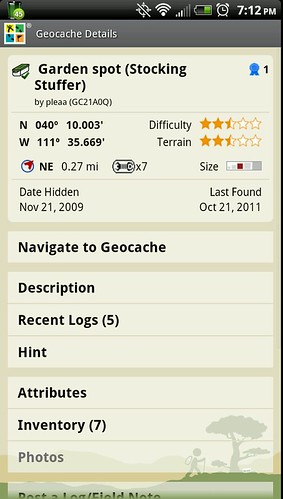 Screen #5 - Cache PageThis screen adds many more options, and shows the same info as the previous screen, however there is more. This screen adds The date the cache was placed, the last find, and who placed it.
Some more options
Navigate to Geocache
I will cover that in just a minute.
Description
This will give you all the info that is on the cache page.
Recent Logs
This will show you some of the last logs, and there is a spot on the bottom of the page to be able to load more caches logs than you can see.
Hint
Really you want to see a hint?
Attributes
You can get a list of attributes for the cache if the cache owner has selected some.
Inventory
This will tell you if there are any travel bugs or geocoins in the cache and what they are. You can actually select those and get more information about them.
Post a Log/Field Note
I will deal with this on a future entry.
Add to favorites
Give the cache a favorite point if you like it.
Save to offline list.
This lets you save a cache to a list of caches so that you can review them offline.
Remove from offline list.
If it was on a list and now you want to take it off.
Find nearby Geocaches
This one lets you do a new search, centered from the cache you are at now
View on Geocaching.com
Takes you to the website
View on External Map
You can go to another map and check the cache.
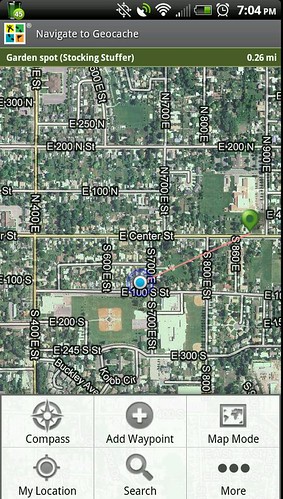 Screen #6Now lets look at the map from Navigating to Geocaching. The map will show you how to get to the cache. There is a menu at the bottom.
The compass will show a compass pointing to the cache. Adding a waypoint will let you select another location to go to, manually.
The Map mode will let you switch to a street view and a Satellite view.
Another search button, and another button that takes you to the settings.
Well that is it for now.